Thursday, November 5, 2015

Star Shaped Candle Holder

Diwali is coming. This festival is colorful with diyas, crackers, flowers etc ,,,
We will make it even more colorful with our crafts.


Lets start the process,,,,,,

Step: 1

Items needed:


1. Papers

2. Thin stick
3. Ruler
4. Glue
5. 2 Acrylic Paints(1 dark & 1 light)
6. Paint Brushes


Step: 2


Take one paper, place the stick at one corner and start rolling. Once you reach the end, apply some glue and stick it. Separate the stick from the roll.

Step: 3


You will need 10 rolls like this for one candle holder.


Step: 4


Take two rolls. Apply very little glue to one roll, at one end. Insert this into other roll. In this procedure, whenever you need to join the rolls, do this way. Don't attach them outside. 

Step: 5


Take the roll which we made in Step 4 and measure 5 inch. Fold the roll five times with this measurement. Because star has 5 sides.
You can change this measurement as per your candle size. 

Step: 6


Make a star shape like this. Apply some glue at one end & join the edges. Make sure your star is in proper shape.

Step: 7


Take one roll and attach this to one corner. Start rolling this to all the corners as shown in the pictures. If you are out of roll, join the rolls as i said in step 4 and continue rolling.
If you covered all the corners once, then you have completed 1 round. Repeat the process an make 4 rounds. Make sure you are giving enough and equal space in all the sides and in all the rounds.

Step: 8


If you have excess roll after completing 4 rounds, cut the excess part. Apply some glue at the edge. Attach this edge to the back side of the star. Hold it for a minute or until it get stick.


Your star will look like this.


Step: 9


Place your candle at the center of the star and check.
If it is not fitting at the center, slowly adjust the sides and make some space.


Step: 10


Take dark color paint in a tray and add few drops of water if needed. Dip the brush in the paint and start painting evenly. I didn't paint on the back side. I did only in the visible areas. 

Don't worry this is not much messy. Keep it aside and give some time to dry.

You can stop at this point or if u want you can decorate it more.
I want to do some more painting.


Take other color paint and put some dots randomly or in any order.
Instead of dots you can draw lines as well.
If you have powder glitters, you can sprinkle it when the base color is slightly wet. Let it dry for sometime.

Here it is,,,,

Our Star shaped Candle Holder is ready.

I made some more in different colors.
After festival you can use these as a wall decor by arranging them in some pattern.


!!!! Wishing you all a Happy & Safe Diwali !!!!

Friday, October 30, 2015

Quilling Ear Rings

Most of the girls like Matching accessories to their dress. How many ever we have, some times we don't get matching items. 


Follow these steps, and create your own accessories and enjoy,,,,


Step: 1
These are the items you needed,,
1. Quilling Papers (Any 2 colors)
2. Quilling comb
3. Slotted Quilling tool
4. Glue
5. Plier
6. Scissors
7. Jump rings and Ear ring Hooks
(In the picture I showed ruler also. We don't need that here. It was a mistake)

Step: 2
Lets make Pink color Tear drop petals:

 - Take pink color paper and start rolling to the Comb. Make 5 rounds. Make sure all the layers should be on top of each other.
 - Hold it tightly and take it out from the comb.
 - With scissors cut the excess part.
 - Apply some glue at the edge and stick it. Now it will look like oval shape.
 - To get tear drop shape, Press gently at one edge with your thumb and forefinger. 

Make all the petals in same size.
One ear ring will have 5 petals. So we will make 10 petals.

Step: 3
Now we will make white color rolls.
 - Take White color paper, place one edge on the Quilling Slotted Tool and start rolling. Make 7 rounds.
 - On the other edge apply some glue and stick it.

Make 10 white rolls like this.

Step: 4
Apply some glue inside of the petals and place the white roll on the glue.
Arrange them in a shape as shown in the picture. At first 2 petals side by side again 2 petals side by side and 1 petal in the middle.
Make sure you are applying enough glue to attach them.

Step: 5
Take pink color paper and start rolling to the Quilling slotted tool. Make 2 small and even sized rolls.

Step: 6
Now join jump rings, ear ring hooks and the pink rolls made in step 5. Attach this to the design.

Here we go,,, colorful Ear rings ready.

We can even make matching Pendant also,,,

Note: 
- You can change the colors as you like. Make sure to select a dark and light color combination.
- You can change the size of the Petal as you like. 
- If you want, you can increase the number of Petals.

Monday, September 14, 2015

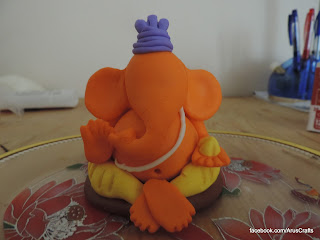
Clay Ganesha


Lets welcome our favorite god Ganesha to our homes on the auspicious occasion of Ganesh Chaturthi,,,

Everyone will be busy making Ganesha's favorite food items for the festival. Here, I am showing you the process of making Environmental Friendly Ganesha at home and keep you even more busy :)

In a previous post, I have shown the process of making Clay at home.


Let's start the process,,,,,

Today I'm making the Ganesha only with clay.


These are the colors i used to make Ganesha.


Before making the process i want to share some tips:

  • There is no need to use Fevicol for attaching pieces. Clay itself has Fevicol, so it sticks automatically.
  • Always make the clay into a ball before making any shapes. This way you will get proper shapes.
  • Always keep the remaining clay inside the air tight bag, so that it will not get dry.
  • Every time you remove the clay from the air tight bag, knead it once.

First we will take a tray and apply some lotion to it. So that you can move it easily.

Ganesha Base:


Take some brown clay.
Make a half inch thick flat shape like this and place it on the tray.


Ganesha Stomach:

Take some orange clay.
Make a ball like this. There should be no cracks.                                              


Place it on the center of the base carefully. After placing it, make sure you have some space in all sides.


Ganesha Legs:


Take some yellow clay. 
Make a ball, roll it like a cylindrical shape. And continue to roll it until you get a shape like this. It should be thin at the center, thick at the sides and thin at the edges.

Arrange these legs on the base around the stomach.

Ganesha Feet:


Take two small balls of orange clay. Press it like rectangular shape. At one end by using a bamboo stick make 5 fingers. 

Arrange these feet to the legs like one on top of the other.

Ganesha Dhoti:
It is very easy.

With the use of bamboo stick make some lines on the legs. It gives the feel of Dhoti.


Ganesha Hands:
Right Hand: 


This hand is for blessing.
Take some orange clay. Roll it like cylindrical shape. We will divide the hand as wrist and elbow by rolling thick at one place and thin at one place.
The first end we will attach to the stomach and the last end is going to be the palm.
Press the last end and bend it. Take the bamboo stick and make the fingers.

Attach the hand to the top of stomach.

Left Hand:


This hand is to hold the modak.
Take ball of orange clay, roll it like a cylindrical shape. We will divide the hand as wrist and elbow by rolling thick at one place and thin at one place.
The first end we will attach to the stomach and the last end is going to be the palm.
Press the last end and make fingers by using bamboo stick.


Attach the hand to the top of stomach.

Modak:
This is ganesha's and everyone favorite.


Take small ball of yellow clay and make it like cone shape.
Real modak will have some lines on it. So, here with bamboo stick we will make some lines.

Ganesha Head and Trunk:


Take a ball of orange clay and roll it like this at one end. 
The round part will be the Head and the other part will be Trunk.

Attach the head on the stomach by covering the joining part of both hands. I want my ganesha's trunk to the right hand side. You can change it as per your interest.

Ganesha Sacred Thread:


Take some white clay and roll it very thin. It should be even throughout.

Place this on Ganesha across from Left hand shoulder to the right hand.

Ganesha Ears:

Take 2 balls of orange clay, press them like round shape.
Make flat at one side to fix them to the head.


Attach the ears on the two sides of the head at the same place. Slightly bend at the edges.

Ganesha Navel:


By using bamboo stick make a small round at the center of the belly.

Ganesha Crown:
I want to make it like a Turban.
Take small ball of purple clay and roll it very thin and evenly.


Arrange it layer by layer until you get your desired size of the crown.

Ganesha Naamalu:
                 
Take 3 very small balls of white clay and roll them evenly and place them on the head.


Take small ball red clay, press it and place it on the center of 3 lines.

Ganesha eyes:


Take 4 very small balls of black clay. Two for the eyes and two for the eye balls.
For the eyes roll the two balls thick at the center and thin in the middle. Bend them in the middle slightly.
Place them on the two sides of the face crossly.

Ganesha Teeth:

Take two very small ball white clay and roll them like cone shape.


Attach them to the sides of the trunk.

Mouse: 

 Take dark grey clay. Press it on one end like this to make the face.        
Take dark grey clay. Roll it thick and even for the tail. 


Join the tail to the back side of mouse. Place two very small balls of black clay as eyes at the front on both sides.

Ganesha Naivedyam:


Take white clay, make it flat circle and bend from the sides. Make some more modaks and place them on the plate.

Ganesha Aasan:

Take golden brown clay and make it like thick, even, rectangular shape.
Make sure you have enough space to place ganesha, mouse and naivedyam.


Place ganesha at the center, mouse at the left, naivedyam at the right.
With bamboo stick make some lines to the sides.


!!!!!!!Ganapathi bappa morya!!!!!!!